Close

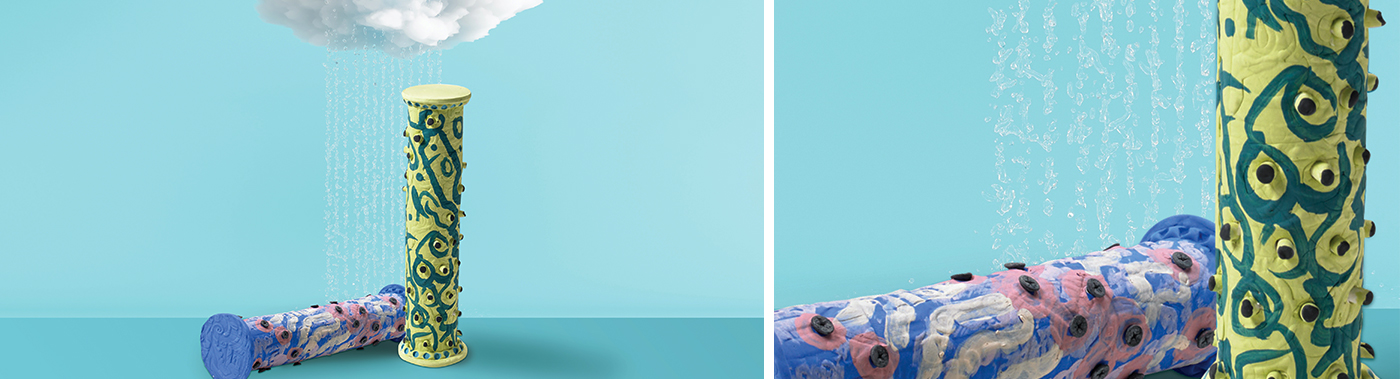
Rain Sticks
Lesson Plan, Grades 6-12, Math, Art, Social Studies, Ceramics & Sculptures, Multi-Cultural
Description
Lesson Plan & Artwork by: Eric Orr
Invented by the Aztecs, a rainstick is a traditional ceremonial and spiritual percussion instrument designed to bring rain. It is a long hollow tube partially filled with small pebbles or beans. Thorns or pins are inserted in the tube walls, and the tube is closed. When turned upside down, the pebbles or beans fall thru the projecting thorns to the other end of the tube. Their sound on their journey as they hit the thorns imitates the sound of rainfall. In many cultures, rainsticks are made (for tourists) from long sections of a dried, hollow, tube-like cactus.
Objectives
- Students will construct a rainstick from clay. The resulting piece will imitate the sound of traditional rainsticks made from cactus.
Supplies Needed
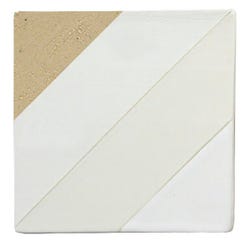
AMACO® Versa Clay, White, 50 lbs.
AMACO® Liquid Underglaze Set No. 712, 2 oz jars, Set of 12
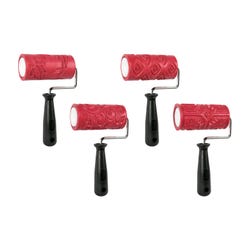
AMACO® Clay Rollers Class Set, 1 Handle and 4 2.5" Sleeves
Chenille Kraft Wood Stylus Sticks, Pack of 100
Complete Slabmaking Kit or Brent® Model SR-20 Floor Model Slab Roller
Fettling Knife
Pin Tool
*Here are the supplies needed for this lesson plan for reference. Find a convenient carousel of shoppable products for this lesson below.
Standards
Standard #1: Generate and conceptualize artistic ideas and work.
Standard #2: Organize and develop artistic ideas and work.
Standard #3: Define and complete artistic work.
Standard #5: Develop and refine artistic work for presentation.
Standard #11: Relate artistic ideas and works with societal, cultural and historical context to deepen understanding.
Instructions
1
Have students bring a paper towel tube. Cover the tubes with one layer of newspaper, and write their names on them.
2
Give students an egg-sized ball of fireable clay. Have students roll all their clay into various bean and seed-sized balls. None should be bigger than a pea. Clay balls should be dried on a tray or paper plate. All dry clay balls can be combined into a class container to share later.
3
Using Amaco® white firing clay (for best color) wedge up a 2.5 lb. ball (grapefruit size).
4
Using .25 inch thick guide sticks and a rolling pin or pvc pipe, roll (on canvas or denim) a clay slab slightly bigger than 7" x 11".
5
With Amaco® Texture Rollers, roll a texture onto the slab.
6
Place a 7" x 11" tag board template on the textured slab and trim around it.
7
Using a small, smooth roller, taper one of the longer sides of the textured slab, turn it over and taper the other long side on the un-textured side. These will join to be the seam of the clay tube.
8
Roll the slab over the paper towel tube, score and slip the tapered edges and gently press the tapered surfaces together to seal the clay around the tube. The tapered overlap should be at least a half inch.
9
Using a texture roller, gently texture the seam, so it will match the rest of the tube.
10
Pat or roll out a 3" diameter disc of your remaining clay to make the bottom tube closure. Tracing around a tin can will work. Texture one side of the disc. This will go on the outside.
11
Center the upright tube on the smooth side of the textured disc. Score and slip the disc onto the bottom of the tube. Roll a worm size clay coil and press it into the joint between the tube and bottom disc for strength.
12
Carefully remove the paper towel tube. With a sharp pencil, poke about 20 holes spiraling up the sides of the clay cylinder. Make sure the holes are cone shaped, with the wide part toward the outside and the narrow part to the inside of the cylinder.
13
Roll the same number of small clay cones into the same shape and circumference as the pencilholes you poked, but long enough to extend in to the interior of the cylinder. Insert the clay cones into the poked holes, and smooth over the clay at the cone base in order to join it to the cylinder clay. It is important to smooth over this clay with fingers or a popsicle stick, as cones will shrink in the holes and you do not want them to loosen. (Clay shrinks 6-8 % when dried/fired.)
14
Wrap a third or half cup of the dry clay balls in small sheets of tissue paper and carefully insert them into the upright tube. Roll out and texture another 3" clay disc. Score and slip it and center it on the tube to close it up. Reinforce again with small worm or coil of clay.
15
NOTE: Be sure to poke 2 small holes with a pin tool or bamboo skewer into the tube side or top, so it will not blow up in the kiln. (The rainstick is now a giant air bubble).
16
Let tubes start to dry and paint on Amaco® LUG Underglaze colors in a design of your choosing. (Amaco® underglazes can go on wet, leather-hard or even bisqued clay) One coat for transparent color, and two to three for opaque color. Dry tube thoroughly and single fire in ceramic kiln to cone 05-04 (1911-1971 degrees F.) Underglazed rainsticks will not stick to kiln shelf or each other as underglaze is colored clay and has a lot less has silica (glass) in it.
EXTENSIONS1) Investigate varying factors affecting rainstick tones:
a. Length and diameter of tube (try a gift wrap cardboard tube).
b. Number and placement of spikes.
c. Number, size and shape of clay balls.
d. Try different versions of spikes... like nails or screws. Short drywall screws twisted into clay work well. 2) Write a story about how, when and where your rainstick might have been used - a ceremony, play, musical or fable?