Close

Gradient Color Studies
Lesson Plan, Grades 7-12, Art, Science, History, Sax, Drawing

Description
Lesson Plan and Artwork by Phyllis M. Annett
Students will use a variety of mediums to create a gradient color study.
Objectives
- Students will know that a gradient image is the directional change in the intensity of color within an area. Students will use the techniques of blending colors to create a progression of color between colors. Students will use the Lyra line of pencils to create an original rendering of an object, animal, bird or sea creature.
- Students will realize that the study of color is part of science, history and art.
Supplies Needed
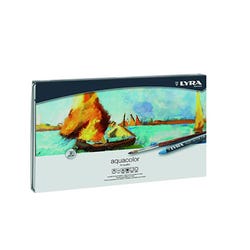
Lyra® Rembrandt Aquarell Colored Pencils, Assorted Colors, Pack of 36
Lyra® Aqua Color Crayons, Assorted Colors, Pack of 48
Lyra® Rembrandt Polycolor Colored Pencils, Assorted Colors, Pack of 12
Sax® Artist Grade Colorless Blender, Pack of 2
Aquabee® 100% Cotton Rag Watercolor Paper, 140 lb., 22" x 30", Pack of 10
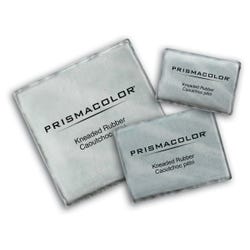
Prismacolor® Kneaded Eraser, Gray, 1 3/4" x 1 1/4" x 5/16", Pack of 12
*Here are the supplies needed for this lesson plan for reference. Find a convenient carousel of shoppable products for this lesson below.
Standards
Standard #1: Generated and conceptualize artistic ideas and work.
Standard #2:Organize and develop artistic ideas and work.
Standard #3: Refine and compete artistic work.
Standard #6: Convey meaning through the presentation of artistic work.
Standard #7: Perceive and analyze artistic work.
Standard #10: Synthesize and relate knowledge and personal experiences to make art.
Standard #11: Relate artistic ideas and works with societal, cultural and historical context to deepen understanding.
Instructions
1
Inform students they will be creating a gradient color study of an animal, object, bird or sea creature with colored pencils, and crayons with both wet and dry applications on watercolor paper. For this illustration, a Weedy Sea Dragon, native to Australian waters, has been chosen as the subject to use the gradient technique.
2
Explain the gradient color technique: a progression of color within an area to be colored. It is a directional change in the intensity of color in an image. It can be a gradual change in color or blending of color from one color to another. A gradient study can be from end-to-end of a space, vertical, horizontal or radial in nature. The color scheme can be primary, secondary, tertiary, complimentary or analogous. Demonstrate this by creating a value study of one color on a strip of 140 lb. watercolor paper. Show students how to apply a heavy layer of colored pencil at one end of the study and gradually reduce pressure until the color is very light at the end of the value color strip. Have students create their own value studies with both the colored pencils and water soluble pencils and crayons. The studies can be on one color in different intensities or one of one color blending into the next and back to the original color.
3
Have students plan their subject matter. Inform students to lightly sketch with big open areas in their designs of their chosen subjects. When they have perfected their sketch, give them pieces of the watercolor to lightly sketch their subjects onto. Inform them that a light sketch will not show through the colored pencil and that kneaded erasers are best to use on watercolor paper since they do not ruin the surface.
4
Have students choose a color scheme. Remind them to refer to their value studies to create areas of gradation. Demonstrate some colored pencil techniques: layering, hatching, and cross hatching. Demonstrate how to burnish colors with the colorless blenders or white crayons and white pencils.
5
Inform students that mistakes of color may be gently lifted from the paper with a piece of masking tape or the kneaded eraser.
6
Demonstrate how to make dark colors by layering colors such a dark blue over a warm red, which gives life to the dark color rather than using just a flat black. Layering with white between colors also will give depth to colors and transition to the next color for a gradient look.
7
Inform students that this process takes time but is worth the wait! Using a limited amount of water to spread color, and using both wet and dry techniques, will yield a very interesting work.
8
Display all work; have students discuss their work and that of others.