Close

Through the Microscope
Lesson Plan, Grades 3-12, Art, Art History, Social Studies, Sharpie, Adapted
Description
Lesson Plan and Artwork by Sue Loesl
Some students have difficulty creating art work using the same art tools as their peers due to physical or other challenges. By using adapted art tools that are larger, easier to grip and have adjustable features, this lesson presents various ways for all students to create an artwork that appears to look as if parts are viewed through a microscope. In an art classroom that utilizes Universal Design for Learning (UDL) concepts, providing these adapted tools as well as traditional art tools (rulers, scissors, paintbrushes, markers and colored pencils) for all students allows every student to use their artmaking skills to one’s potential.
Objectives
- Students will create lines that appear to become enlarged as if looking through a microscope.
- Students will experiment with analogous and complementary color schemes.
- Students will use adapted art tools to create their artwork.
Supplies Needed
Sulphite Drawing Paper, 80 lb, 9 x 12 Inches, Extra-White, pack of 500
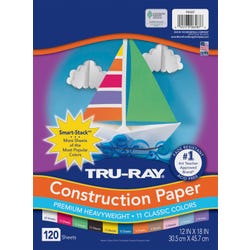
Sulphite Construction Paper, 12 x 18 Inches, Assorted Colors
2 Hole Metal Pencil Sharpener
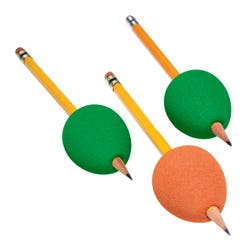
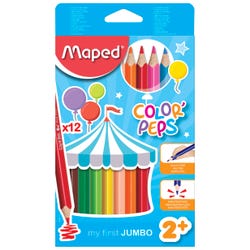
Jumbo Triangular Colored Pencils, Assorted, set of 12
Glue Stick, .77 oz,, pack of 12
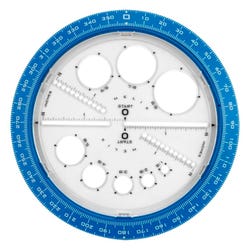
Angle and Circle Maker
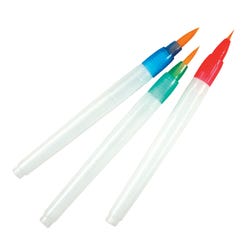
Triangular Watercolor Pencils, set of 24
Watercolor Paint Brush Set, Assorted Size, set of 3
Engineer Metric Triangular Ruler
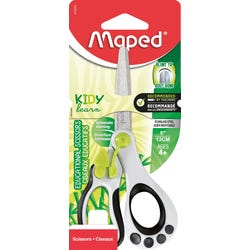
Adapted Educational Scissors, 5 Inch Blunt (Right & Left Handers)
Creative Collection™ Metallic Finish Cardstock, Assorted Light Colors, Pack of 40 Sheets
Washable Fine Tip Markers & Marker Stand, Set of 12
Astrobrights® Cardstock, Black, Pack of 100 Sheets
*Here are the supplies needed for this lesson plan for reference. Find a convenient carousel of shoppable products for this lesson below.
Standards
Standard #1: Generate and conceptualize artistic ideas and work.
Standard #5: Develop and refine artistic work for presentation.
Standard #7: Perceive and analyze artistic work.
Standard #10: Synthesize and relate knowledge and personal experiences to make art.
Instructions
1
Tape the 9x12 white drawing paper to the work surface.
2
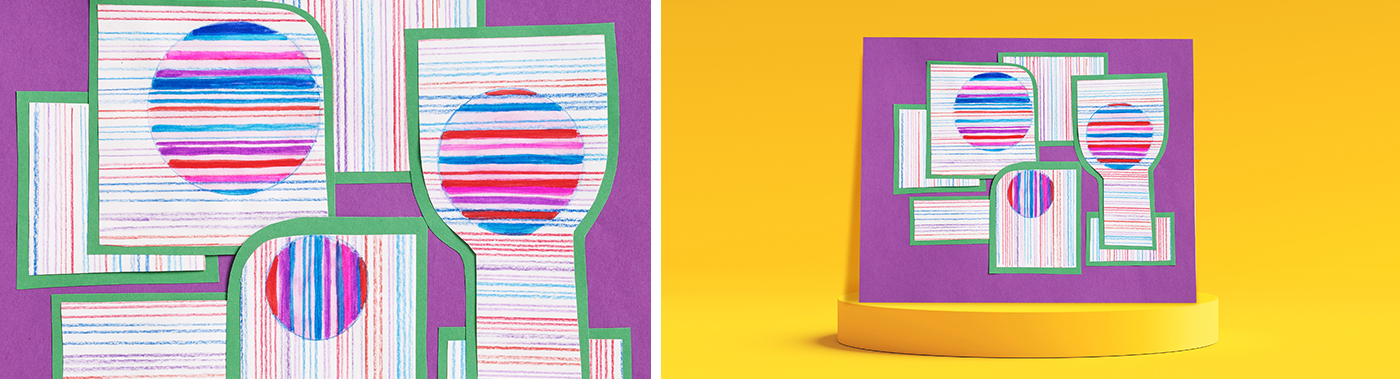
Use large triangle shaped colored pencils and the angle & circle maker to draw 3 different sized circles from 2”- 3 1/2” on a piece of 9x12 white drawing paper. Space out the circles on the paper.
3
Choose a set of analogous colors (example: green, blue, purple) from a jumbo colored pencil and watercolor pencil set. Consider adding an Abilitations Egg-Oh's to help with grip. These pencils will draw thin and thick lines. The pencil sharpener will help keep lines very thin so that there are 3 potential thicknesses of colored pencils – very thin, thin and thick as the pencils are used.
4
Starting at the edge of the paper, either vertically or horizontally, use the triangular shaped ruler to draw straight lines across the paper, drawing through the circles. Lines can be close together or farther apart, changing out color and pencil choices at will. Multiple lines of one color can follow single lines of color, creating patterns and repeated colors. Three to five mixed colors, large and colored pencils can also be bundled together with a rubber band and pulled along the edge of the ruler to reduce fatigue in creating multiple lines.
5
This part is finished when the entire piece of white paper is completely lined with analogous colors of regular and watercolor pencils.
6
Brush the water only over the circles that were drawn. Because the watercolor pencils were used to draw the lines in the circles, the water will activate the watercolor part and blend the colors.
7
While the paper is still wet, choose the same analogous color scheme from the thin and thick markers and add more lines to the circles. These new lines will spread with the water and create the effect of an enlarged area of the drawing. Add more water if the markers don’t spread out a bit. Let dry.
8
When dry, use the adapted scissors to cut the design into 5-7 pieces, using the drawn lines and circles as guidelines. Pieces can be of various sizes and shapes, but ideally, plan to use the entire drawing for the pieces, cutting the pieces into various sizes.
9
Choose a complementary color of construction paper as the bordering paper for all the pieces.
10
Using glue stick, glue the cut pieces onto the complementary colored construction paper, leaving about an inch of space between the pieces.
11
Cut a small border of about a half inch around each piece. (The borders do not have to be even all around the pieces.)
12
When all the pieces are cut out, lay them out on another piece of colored construction paper, this time, back to the analogous color scheme. Move the various pieces by turning the designs perpendicular to each other, on angles to each other, including overlapping the pieces to create a new design with these bordered pieces.
13
When a pleasing design is achieved, use the glue stick to glue the pieces onto complementary construction paper.