Close

Pastel Portraits
Lesson Plan, Grades 9-12, Art, Art History, Drawing
Description
Lesson Plan and Artwork by Kathryn Cahil
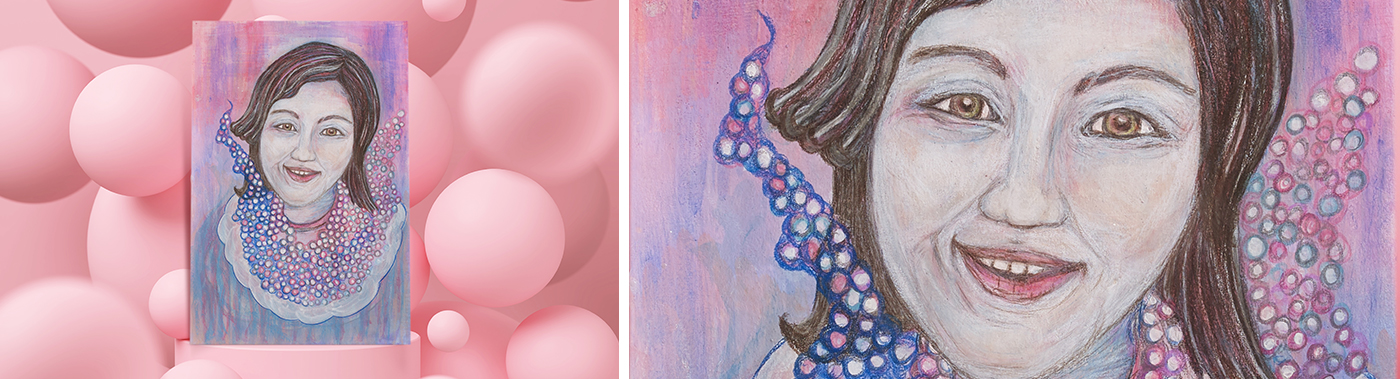
This lesson focuses on creating an expressive portrait in a bright color palette similar to the contemporary portrait artist Emma Uber. It plays with the basic concept of mixed media art – building up layers – but it uses the unconventional pair of pastels and matte medium to create depth and saturation. Use different products to layer, blend, create texture, and increase opacity and visual variation.
Objectives
- Students will research contemporary portraiture.
- Students will try new color palettes, including bold and bright.
- Students will understand layers in mixed media work and play with transparency, translucency and opacity.
- Students will create an expressive portrait.
Supplies Needed
Paper-XL 12 x 18" 300g-140# Watercolor 30 sheets/pad
Medium Matte Pint Squeeze Bottle
Pastels, set of 48
Paddle Brush 2”
Ready-To-Use Acrylic Gesso in 1 qt
Scissors
Portrait Pencil, set of 24
Brush Soft Grip White Taklon, set of 5
Watercolor Pencil, set of 36
*Here are the supplies needed for this lesson plan for reference. Find a convenient carousel of shoppable products for this lesson below.
Standards
Standard #3: Define and complete artistic work.
Standard #5: Develop and refine artistic work for presentation.
Standard #11: Relate artistic ideas and works with societal, cultural and historical context to deepen understanding.
Instructions
1
Research contemporary artist Emma Uber and her style of portraiture. Uber sometimes combines the facial features of herself, those of people she knows, and also adds in features from collected references. She defies the tradition of photo-realistic portraits by adding an intensely colorful arrangement of shapes, lines and drips around the face to add interest and curiosity to her characters.
2
Use a light pencil to sketch a face and features, be sure to avoid digging into the paper by pressing too hard.
3
Create a transparent background layer by brushing on the matte medium with the 2” paddle brush while adding in shaved dust. Combining the dust with the matte medium, creates a custom transparent or translucent matte acrylic color that can be applied in multiple thin layers to create depth and increase color saturation in the background. The medium “fixes” the pastel as it dries. The matte surface is slightly textured which allows successive layers to be applied using dry or wet media. Large, vertical brush strokes give the painting a more traditional, gritty pastel look. Let the work dry completely between layers or speed up drying with a hair dryer or heat tool.
4
Use gesso on the face to give it contrast and to make that area the focal point. Let the Gesso dry completely before working on top.
5
Wet the brush and use the pastels as a watercolor cake or stick. Apply color to the face and surrounding area using the pastels wet or dry. They are very versatile and blend easily. When desired, a layer of coloring is achieved by carefully applying a thin layer of matte medium with the side of a soft flat brush to seal and prepare you for the next layer. This step can be repeated many times until the desired coloring result is achieved. Use the gesso as a white out and begin layering again if the desired outcome is not achieved.
6
Add in details to the surface with watercolor pencils. While this could be done with a tiny brush and wet pastels, the pencils give your lines a quick, hard, opaque edge. Certain types of pencils may act as a resist to future layers, so be aware of the type used. Experiment and have fun adding in bright, bold colors in the final layers of the piece. Seal the portrait with more matte medium.