Close

Iridescent Ocean Textile Prints
Lesson Plan, Grades 3-12, Science, Art, Printmaking
Description
Lesson Plan and Artwork by Nadine Dresbach
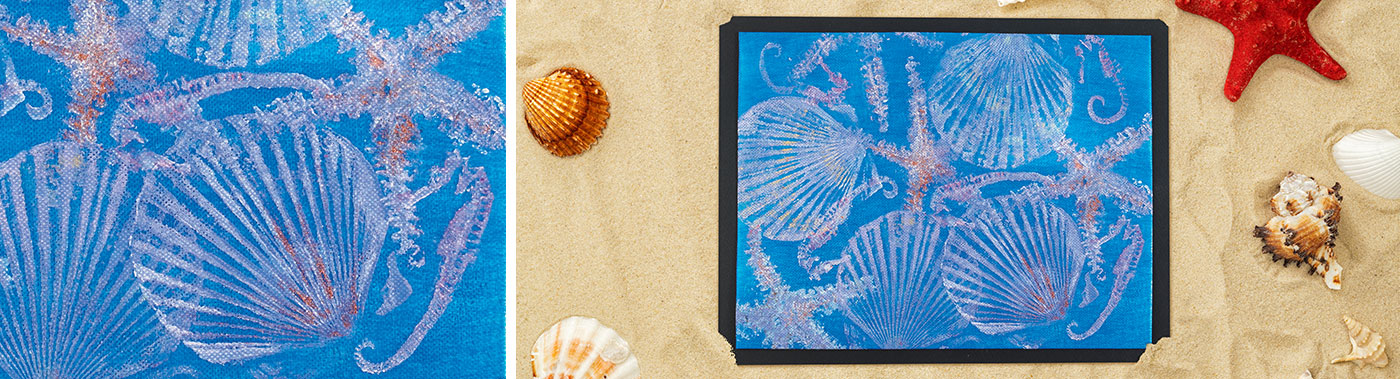
Create shimmering ocean images with a few simple materials and steps. In this lesson textile inks are used on Gyotaku fish and shell models and are printed onto Smart-Fab®. The Smart-Fab® is then mounted on iridescent paper and foil board to produce a glowing background surface.
Objectives
- Students will gain knowledge of Gyotaku printing techniques.
- Students will learn and experience the process of design layering of color and creation of depth.
- Students will utilize the elements and principles of design in selecting a composition.
- Students will experiment with various printing applications to achieve the textured and pearl effect on their prints.
Supplies Needed
Supply #1 1467637 Speedball® Fabric Block Printing Ink, Assorted Colors, Set Of 8
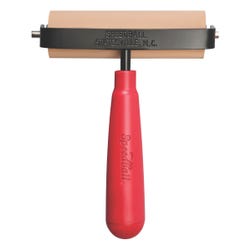
Supply #2 216495 Speedball® Soft Rubber Brayer, 4" (Kit includes 2)
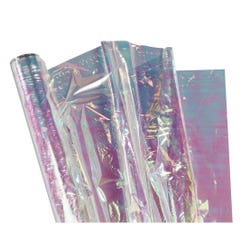
Supply #3 207460 Iridescent Cellophane, 36" x 12 1/2" Foot Roll
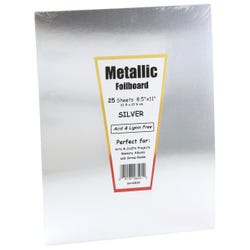
Supply #4 1494253 Metallic Silver Foilboard, 8 1/2" x 11", Pack of 25
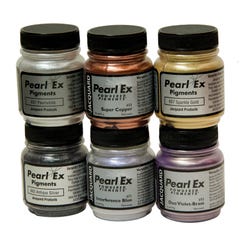
Supply #5 247581 Pearl Ex Metallic Paint Pigments, .75 oz., Set of 6
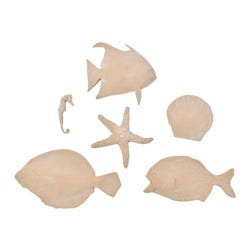
Supply #6 248401 Gyotaku Fish Print Models, Tropical, Set of 6
Supply #7 1394897 Smart-Fab® Fabric, Blue, 48" x 40 Ft Roll
Supply #8 1430812 Smart-Fab® Fabric, Sky Blue, 48" x 40 Ft Roll
Supply #9 1394898 Smart-Fab® Fabric, Dark Blue, 48" x 40 Ft Roll
*Here are the supplies needed for this lesson plan for reference. Find a convenient carousel of shoppable products for this lesson below.
Standards
CONTENT Standard #1: Generate and conceptualize artistic ideas and work.
CONTENT Standard #2: Organize and develop artistic ideas and work.
CONTENT Standard #3: Define and complete artistic work.
CONTENT Standard #5: Develop and refine artistic work for presentation.
CONTENT Standard #10: Synthesize and relate knowledge and personal experiences to make art.
Instructions
1
Select an assortment of the Gyotaku fish and shell models.
2
Select what color Smart-Fab® you will use for a base. Be sure to experiment with a scrap piece of Smart-Fab® first.
3
Use printing ink and a rubber brayer to roll a toothpaste-sized amount of ink out onto a plate until it becomes the texture of an orange peel.
4
Roll the inked brayer onto the surface of the rubber model making sure to cover all surface areas.
5
Leave the rubber model on your table surface and place the Smart-Fab® on top of it pushing down with your hand to pick up all of the texture of the rubber shell- you will see the ink come through a little bit and this is a good indicator that your print is transferring.
6
While the rubber model and the print are still wet, use the Pearl Ex dust and a dry-brush and dust the rubber model to create accents, stripes or highlights.
7
Matching it up to the first print, lay rubber model down and press to transfer the Pearl Ex dust to your printed image.
8
Repeat this process using various colors of ink, colors of Pearl Ex dust, and rubber shapes. Layer them to create an interesting composition on your large piece of Smart-Fab®.
9
After allowing it to dry, cut a piece of metallic silver foilboard to the size of your desired finished piece. Wrap the foilboard with the iridescent cellophane, securing it to the back with tape. Wrap your finished print over the prepared foilboard..
10
Title, mount or mat your finished piece.