Close

Through the Telescope
Lesson Plan, Grades 5-9, Art, Science, Painting, Mixed Media

Description
Lesson Plan and Artwork by Nadine Dresbach
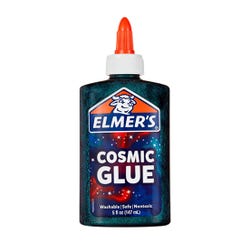
The images in this lesson plan are inspired by massive clusters of stars in regions NGC 604 and NGC 6357. The inspiring photographs are composite images from the telescopes of NASA’s Chandra X-Ray Observatory. X-ray telescopes enable us to see bright young stars and the gasses surrounding them. The iridescent properties and colors of Elmer’s Cosmic Glue are a key to this lesson while each tilt of the canvas brings new light and color to the finished image.
Objectives
- Research star cluster formations and the science behind the imagery.
- Translate the telescope images use of color, lights and darks onto canvas.
- Learn to use a non-traditional medium in a painterly form.
Supplies Needed
Elmer’s® Cosmic Shimmer Glue, Orange/Red, 5 oz
Elmer’s® Cosmic Shimmer Glue, Teal/Purple, 5 oz
Elmer’s® Cosmic Shimmer Glue, Purple/Blue, 5 oz
Fredrix® Value Series Cut Edge Canvas Panel, Round, 12 in Round, White, Pack of 25
Sharpie® Non-Toxic Non-Washable Oil Based Paint Marker, Medium Tip, White
Sharpie® Non-Toxic Oil-Based Permanent Paint Marker, Fine Tip, White
Sharpie® Fine Point Metallic Permanent Markers, 2 Pack, Silver
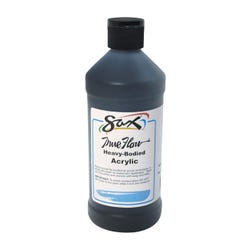
Sax® True Flow® Heavy Bodied Acrylic Paint, Mars Black, Pint
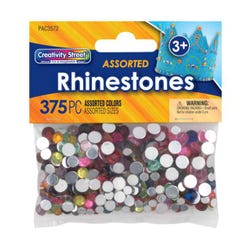
Creativity Street® Assorted Shape Rhinestone, Assorted Size, Assorted Color, Pack of 375
Additional materials:
Toothpicks, foam brush, paper towels
Standards
Standard #1: Generate and conceptualize artistic ideas and work.
Standard #2: Organize and develop artistic ideas and work.
Standard #5: Develop and refine artistic work for presentation.
Standard #9: Apply criteria to evaluate artistic work.
Instructions
1
Have students research the NASA website nasa.gov and nasa.gov/Chandra to visit the Chandra image galleries and explore how and why composite images are created at NASA’s Chandra X-Ray Observatory.
2
Have students select an image that they would like to emulate. After an image has been selected have them experiment with the Elmer’s Cosmic Glue on a scrap piece of poster board or nonporous surface. Allow them to test the viscosity and various colors of glue and analyze which ones they would like to use as well as experimenting with how they react when mixed.
3
To prepare the canvas surface for this lesson, use black acrylic paint, a foam brush and a paper towel. Apply the black acrylic towards the edge of the canvas and gradually taper it inward leaving the center mostly white. Using the paper towel scrunched up, dab at the surface of the paint to remove it from areas that need to be lighter and dab it a little bit in the center for the areas that need to be darker. Leave white areas of the canvas exposed to emphasize the highlights of the star clusters in the galaxy.
4
Using the preselected Elmer’s Cosmic Glue colors, apply them in specific areas and patterns to emulate the clusters of stars and swirling gasses.
5
If desired, in some areas, a small dot of white acrylic could be used underneath the glue to add a little extra brightness. Swirl the Elmer’s Cosmic Glue on top of and into it. The Elmer’s Cosmic Glue will look dimensional when applied but will dry completely flat.
6
While the Elmer’s Cosmic Glue is still wet, apply the rhinestones of various sizes depending on the sizes of the stars in the cluster. Be sure to press them firmly into the glue. No other adhesive is necessary.
7
For all the tiny stars along the outer edge, as well as occasionally throughout the piece, three different methods of application can be used. The first is executed when the Elmer’s Cosmic Glue is still a little wet or tacky. Use the tip of a toothpick and a toothpick broken in half. Put the tip onto the canvas and give it a little twist. This removes the glue and some black acrylic and exposes a white spot as a star. Next, use a silver Sharpie Marker to create stars, and lastly the white Sharpie Oil Based Paint marker with a very gentle touch. Using these three different techniques and materials enables all the tiny stars to not only appear to be various sizes but different intensities as well.
8
When complete, display the telescope images as a class grouping and have the students discuss the star region they selected for inspiration and why. Invite a science class from a younger grade level to sit in!