Close

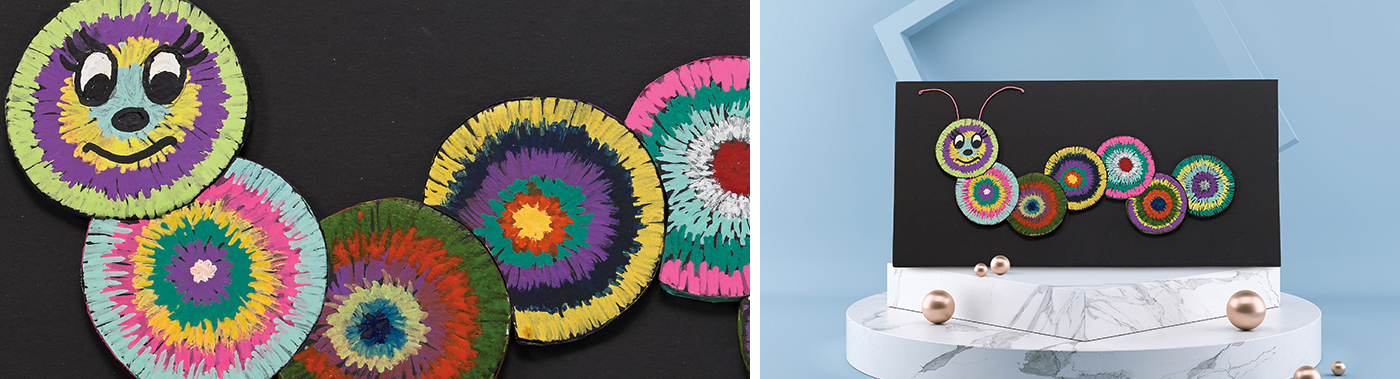
Whimsical Caterpillars
Lesson Plan, Grades 1-4, Art, Science, Crafts
Description
Lesson Plan and artwork by Carol Miller
Caterpillars are the larval form of insects which eventually become moths and butterflies. Here, the caterpillar is depicted as a whimsical character of bright colored foam board or card stock circles mounted on black foam board. The lesson plan can be used as group art where each student contributes one embellished circle or an individual completes several circles forming a caterpillar of their own using the Painter® Paint Markers.
Objectives
- Students will become familiar with the larval stage of moths and butterflies and their characteristics.
- Students will create their own whimsical, unique version of a caterpillar.
Supplies Needed
Sharpie® Creative Markers, Bullet Tip, Assorted Earthtone Colors, Set of 12
Sharpie® Creative Markers, Brush Tip, Assorted Colors, Set of 12
School Smart Foam Boards, 20 x 30 Inches, Black, Pack of 10
Elmer’s® Glue-All, 4 oz.
X-ACTO Z Series Light-Weight Precision Knife, No. 11, Stainless Steel Blade, Aluminum Handle
Array® Card Stock, Black, Pack of 100
"School Smart® Student Scissors, 6"" Blunt"
X-ACTO Replacement Blades, No. 11, Steel Blade, Pack of 100
Crayola Modeling Clay Classpack, Assorted Colors, Set of 288
Crayola Modeling Clay, 1/4 Pound Packs, Assorted Natural Colors, Set of 4
Standards
CONTENT Standard #1: Generate and conceptualize artistic ideas and work.
CONTENT Standard #2: Organize and develop artistic ideas and work.
CONTENT Standard #10: Synthesize and relate knowledge and personal experiences to make art.
Instructions
1
Study images of caterpillars to become familiar with the many varieties and designs they display.
2
Teachers can cut circles from foam board using artist knives, or students can cut circles from card stock using scissors.
3
If a group project is desired, have each student make one circle out of card stock.
4
Lightly use a pencil to trace a circular container lid close to an edge of the foam board or card stock.
5
For foam board, using the artist knife on a cutting mat or discarded foam board, cut a square slightly larger than the circle.
6
Cut radial slits from the circle to the edge of the square, about 1/2" apart. This will allow you to bend them up or down, making it easier to cut out the circle.
7
After cutting, smooth out any irregularity by rolling the circle on a table top and applying pressure to problem areas.
8
Repeat for each circle you desire.
9
Cut a crescent shape out of one circle.
10
Use this as a template to trace and cut one crescent shape from every circle. Leave one circle with no cutout, to be used as the head.
11
Use paint markers to design and color each circle, covering the edge, as well.
12
Draw facial features on the head circle.
13
Straighten two plastic-covered paperclips for the antennae.
14
Curl one end and push the other end into the foam of the head circle or apply to the back of the card stock head for each antenna.
15
Arrange the circles on a rectangle of foam board and glue in place.