Tribal Masks

Description
Lesson Plan and Artwork by Carol Miller
Tribal Masks have been a part of numerous cultures throughout history. They marked occasions such as religious ceremonies, harvest festivals, rituals and funerals. This lesson plan includes a template that will aid in experimenting with symmetrical pop-up techniques as applied to decorative mask making. Dot painting patterns, which are identified with Aboriginal art in Australia, as well as on other continents, are then drawn.
Objectives
- Students will experiment with symmetrical pop-up techniques, resulting in the creation of a tribal-type mask.
- Students will draw symmetrical dot painting patterns to embellish the raised, relief mask.
Supplies Needed
Sharpie® Metallic Permanent Markers, Metallic Gold, Fine, Pack of 12
Sharpie® Metallic Permanent Markers, Metallic Silver, Fine, Pack of 12
Sharpie® Metallic Permanent Markers, Metallic Bronze, Fine, Pack of 12
Creative Collection™ Metallic Finish Cardstock, Assorted Dark Colors, Pack of 40 Sheets
Creative Collection™ Metallic Finish Cardstock, Assorted Light Colors, Pack of 40 Sheets
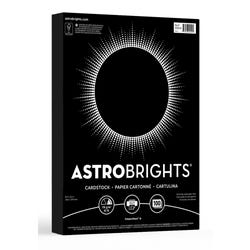
Astrobrights® Cardstock, Black, Pack of 100 Sheets
*Here are the supplies needed for this lesson plan for reference. Find a convenient carousel of shoppable products for this lesson below.
Standards
Standard #1: Generate and conceptualize artistic ideas and work.
Standard #2: Organize and develop artistic ideas and work.
Standard #3: Define and complete artistic work.
Standard #5: Develop and refine artistic work for presentation.
Standard #10: Synthesize and relate knowledge and personal experiences to make art.
Instructions
1
If the mask would be correlated with a specific culture, discuss the historical context and possible symbolism.
2
Download mask template. Trim the template to 4 1/4" X 11".
3
Using practice paper, fold in half, vertically. Place the template on the paper with the fold to the right and transfer by drawing over the black lines with enough pressure to leave an imprint. Cut on the black line impressions, keeping the paper folded.
4
Place the template on the folded paper again and transfer the red and blue lines ignoring the lines on the center fold for now. Unfold the mask and using the template’s back-side, do the same on the right side of the mask, drawing on the imprint of the template’s red and blue lines. This will create scoring lines for folding. Elementary students should disregard the cheek folds, which are for more advanced students.
5
Using the red and blue lines on the template as a guide, fold the red lines, pointed toward you and fold the blue lines, pointed away from you.
6
The angled folds on each corner will later provide a surface to affix the finished mask to a mounting and will allow you to determine how wide or narrow it will be.
7
The folds along the center fold will define the eyes nose and mouth, by pushing folds inward and outward according to their color.
8
The cheek folds add design and also cause the nose to overlap, downward, creating another plane. The edge of a ruler may help in folding these narrow creases. Also, try alternating the folding of each crease from the left and right cheeks, instead of doing all one side at a time.
9
Now, decide if you will create your own template, make changes to this one or use the included template.
10
Use the Sharpie® Metallic markers to create the dot painting patterns. To make small dots use very little pressure. Larger dots require greater pressure and holding the marker in place for a few seconds. Smaller dots could also be drawn on top of larger dots. Lines can be created with a string of dots touching. Experiment to create new dot patterns.
11
Hair or beards can be made by drawing a simple pattern or lines with a ruler on a separate piece of cardstock using the Sharpie® Metallics. Then cut strips of the embellished paper, the length you’d like the hair to be, plus allow 1/2” for affixing to the mask. Cut slits 1⁄8" to 1/4" across the strip, leaving 1/2" along one side.
12
Using glue or double sided tape, attach hair or beards. You may wish to use two or three layers to obtain greater bulk.
13
Mount carefully, onto a separate sheet of cardstock, using glue or double sided tape on each of the corner folds that are closest to the corner’s edge. Determine the width of the mask and adhere in place.


