Close

Symmetrical Color Theory Designs
Lesson Plan, Grades 4-12, Art, History, Science, Language Arts, Drawing
.jpg)
Description
Lesson Plan and Artwork by Nadine Dresbach
Students will expand their knowledge of color theory using overlapping shades of colored pencils to create color mixing within predesigned spaces. Shapes of color will be outlined using a fine line marker. Designs will be created using concentric circles of varying sizes on a pre-established grid using the Helix® wide ruler to build symmetrical designs using the Helix® Angle and Circle Maker.
Supplies Needed
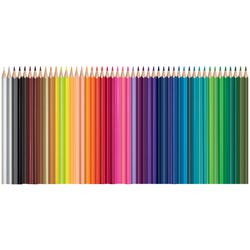
Maped® Color'Peps Colored Pencils, Assorted Colors, Set of 48
Maped® Color'Peps Maxi Markers, Assorted Colors, Set of 8
Maped® Graph'Pens Fineliner Pens, Assorted Colors, 0.4mm, Set of 20
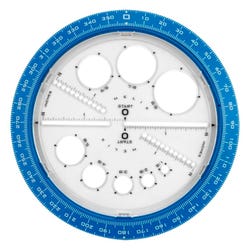
Helix Angle and Circle Maker Protractor/Compass, Assorted Colors, 1/8" - 4"
Helix Unbreakable Wide Ruler, Assorted Colors, 12"
*Here are the supplies needed for this lesson plan for reference. Find a convenient carousel of shoppable products for this lesson below.
Standards
Standard #1: Generated and conceptualize artistic ideas and work.
Standard #5: Develop and refine artistic work for presentation.
Standard #7: Perceive and analyze artistic work.
Standard #10: Synthesize and relate knowledge and personal experiences to make art.
Instructions
1
Begin by using the ruler to create a light pencil grid on your paper. Dividing the paper evenly into 16 sections. This will create a guide for your Helix® Angle and Circle maker.
2
Following package directions, place the Helix® Angle and Circle maker in the center of the paper and select a circle size. Hold outer edge firmly, and place pencil point in hole, making a continuous circular motion. Repeat this step without moving the circle maker from the starting point if additional circle sizes are desired. This will form concentric circles.
3
Select another point on your grid to the LEFT of the center circle. Repeat step 2.
4
Select the same point on the RIGHT side of your center circle and repeat step 2.
5
Repeat steps three and four until an overall pattern is made on your paper.
6
Using the colored pencil set, select a color palette. This example is using cool colors. At this point we will create a mirror image to the top and bottom, right and left. Using the colored pencils, color larger sections first, overlapping by design in smaller sections to create different tones and new colors. Be sure to mirror the color use on the left and the right side of the paper.
7
Trace each color section using a fine line marker. Not all sections need to be traced just the ones that you want to emphasize.