Close

Inventive Stabiles
Lesson Plan, Grades 3-12, Art, Science, Elmer's, 3-D
Description
Lesson Plan and Artwork by Dana DuMont
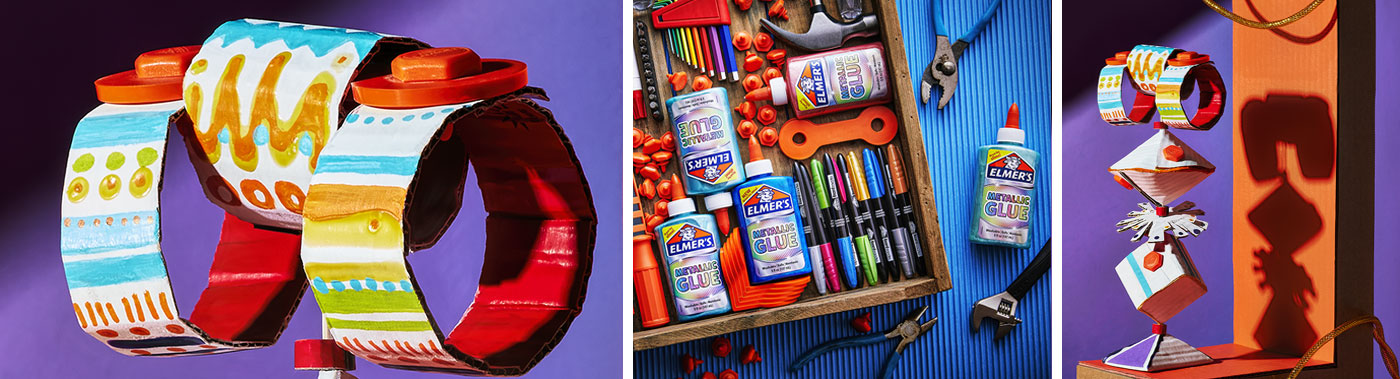
Using Elmer’s Build It Tools in combination with Elmer’s Glue, Elmer’s Painters Paint Markers and cardboard, student artists can explore the juxtaposition of form, color and concepts as parts turn and reposition shift in space. As they experiment with building 3D forms from 2D shapes, and adding surface design and/or symbolic imagery, they will create unique stabiles on their own or as group projects. Along with using measuring, spacial and engineering skills, this unit can be used to allow students to create visual and conceptual connections between varied images, and the completed stabiles will spark interest and conversation when on display.
Objectives
- In groups or individually, students will learn how to stack forms to create freestanding stabiles with moving elements.
- View sculptural works of artists such as Martin Puryear, Ann Weber, Alexander Calder, Michele Stitzlein, David Smith, James Hampton and Jean Arp and discuss elements of kinetic art.
- Learn how to measure, draw and cut 2D cardboard shapes to create vibrant 3D forms.
- Discuss, display, and constructively critique their sculptures.
Supplies Needed
Things You May Also Need:Elmer's® Metallic Glue, Blue, 5 Ounces
Elmer's® Color Changing Glue, Pink/Purple, 5 Ounces
Elmer's® Cosmic Shimmer Glue, Purple/Blue, 5 Ounces
Elmer's® Cosmic Shimmer Glue, Orange/Red, 5 Ounces
Elmer's® Glow in the Dark Glue, Blue, 5 Ounces
Elmer's® Painters® Paint Markers, Assorted Bright Colors, Fine Tip, Set of 5
Elmer's® Washable School Glue Stick, 0.77 Ounces, Clear, Pack of 30
Elmers® Board Mate® Metallic Marker Conical Tip, Assorted Metallic Colors, Set of 6
Sharpie® Metallic Permanent Markers, Fine Tip, Assorted Colors, Pack of 36
Elmer's® Glue-All® Multi-Purpose Glue, Gallon
Elmer’s® Disappearing Purple Glue Stick, Purple 0.21 Ounces, Pack of 12
Creativity Street® Translucent No-Spill Paint Cups, Assorted Colored Lids, 3 Inches, Set of 10
Ticonderoga® EnviroStiks™ Pencils, No 2 Tips, Pack of 12
Fiskars® Student Scissors, 7 Inches, Pointed Tip, Color Will Vary
Sax® Versatemp® Heavy-Bodied Tempera Paint, White, Gallon
SunWorks® Heavyweight Construction Paper, 12 x 18 Inches, White, Pack of 100
X-ACTO® Artist Knife with Cap, No. 1, Aluminum Handle
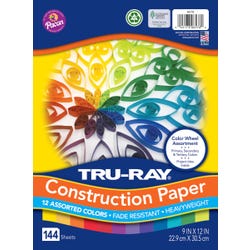
TRU-RAY® Construction Paper, 9 x 12 Inches, Assorted Colors, Pack of 144
Scotch™ Blue Multi-Surface Painter's Tape, 60 Yards x 0.94 Inches, Pack of 6
Baumgartens Conserve™ Plastibands® Assorted Size, Assorted Color, Box of 200
School Smart® Felt Tip Pens, Water Based Ink, Fine Tip, Black, Pack of 12
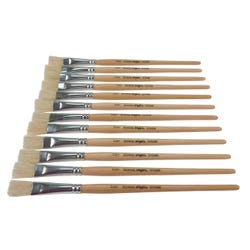
School Smart® White Bristle Short Handle Flat Paint Brush, 1/2 Inch, Pack of 12
School Smart® Butcher Kraft Paper Roll, 40 lbs, 18 Inches x 1000 Feet, White
School Smart® Metal Edge Wood Ruler, Double Bevel, 12 Inches
*Here are the supplies needed for this lesson plan for reference. Find a convenient carousel of shoppable products for this lesson below.
Small Recycled Cardstock/Paperboard Boxes
Recycled Corrugated Cardboard
Bamboo Skewers
Standards
Standard #1: Generate and conceptualize artistic ideas and work.
Standard #2: Organize and develop artistic ideas and work.
Standard #3: Refine and complete artistic work.
Standard #5: Develop and refine artistic work for presentation.
Standard #7: Perceive and analyze artistic work.
Standard #9: Apply criteria to evaluate artistic work.
Standard #10: Synthesize and relate knowledge and personal experiences to make art.
Instructions
1
View works by Martin Puryear, Ann Weber, Alexander Calder, Michele Stitzlein, David Smith, James Hampton and Jean Arp and discuss how and why artists create stabiles and kinetic sculpture. Define stabile, mobile, and kinetic sculpture, and discuss how artists can achieve complete and united 3D compositions. Identify materials used in sculpting, and review sculpture in the round and folding techniques for creating 3D forms (cylinder, box, cone, hoop, pyramid, sphere, etc.) from 2D shapes.
2
Demonstrate measuring, cutting, and creating cardboard forms. Have students sketch multiple ideas for stabiles, including surface design, color scheme/image concept, and then select final plans.
3
For example; using rulers, thin cardboard or paper board and felt markers, measure 2” wide x 10” long with 2”x8” cross piece T shapes for boxes. Cut 6”-14” long strips for cylinder shapes. Trace circles for cone shapes. Use four pointed stars or triangle with 3 flaps for pyramid shapes. Paperboard or cardstock strips can also be used to create spheres and half spheres. Draw flaps on edges of forms that will fold and secure edges. Cut a 1”x1.5” piece of cardboard, make a row of slits halfway up the 1” side, fold slits at a 90-degree angle and roll into a cylinder with flared ends. This will go inside your base form and hold the center skewer pole. For young classes, recycled small paperboard boxes and tubes can be unfolded, turned inside out, and refolded. Spacers or beads can be created by cutting thin strips of cardboard and rolled into small cylinders.
4
Cut cardboard with Elmer’s Build It Tools Cutting Tool or scissors, depending on the shape and piece of cardboard you’re using. Then make slits for cones, fold boxes and cylinders, and mark/pierce with Elmer’s Build It Tools Holepunch where you’ll drill holes for Elmer’s Build It Tools Screws.
5
Write initials on all cardboard pieces or on white roll or construction paper for groups of pieces, paint with white Sax Versatemp Heavy-Bodied Tempera Paint and let dry on the white paper. Also paint bamboo skewers.
6
Using Elmer’s Build It Tools Holepunch, create holes, and flip the tool to use the screwdriver side to insert Elmer’s Build It Tools Screws. Elmer’s Build It Tools Brackets can also be used to connect forms. Using one hand inside a form helps to apply pressure and guide the screw into place. Now pierce locations where skewer will enter and exit the forms.
7
Using Elmer’s Glue-All or Glue Stick, adhere all flaps, interior and edges of forms. Glue all spacers/beads. White SunWorks Heavyweight and/or Tru-Ray Color Construction Paper can be glued over edges for additional support, and using Baumgartens Conserve Plexibands and Scotch Blue Multi-Surface Painter’s Tape over small folds and flaps will allow forms to keep their shape as they dry.
8
Remove Plexibands and Scotch Painter’s Tape, apply surface design with any of Elmer’s Glues with color, Painters Paint Markers and Board Mate Metallic Markers. Layered construction and other papers can also be applied. Let pieces dry.
9
Compose final stabile with moving part(s), test balance, make needed adjustments.
10
Discuss the challenges, skills and knowledge gained from the process, critique final compositions and display work along with artist statements or informational gallery label.