Close

Intaglio Printmaking
Lesson Plan, Grades 9-12, , College, Art, Speedball

Description
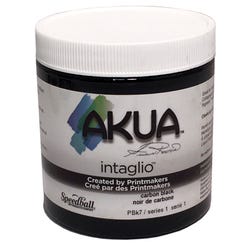
Intaglio, (pronounced "in-TAHL-ee-oh) is a print, not a reproduction. In a print, the artist will have knowingly chosen their medium, conceived and made the print by themselves.Akua Intaglio Inks are non-toxic, water-based soy inks that are brilliant, lightfast and permanent. These inks are formulated for both Intaglio and Etching and contain no dryers or toxic fumes.
Objectives
- Students will explore and produce authographic, creative prints evolving from modern methods of intaglio printmaking.
- Students will study the range of contextual connections influencing the Intaglio process including: historical elements, etching, engraving, inking, wiping, paper-making, printing, and curating the print.
- Students will understand Intaglio as the reverse of relief printmaking. A positive image is created from the ink filled lines, leaving the raised ink characteristic on the paper.
Supplies Needed
Akua Intaglio Ink, Transparent Base, 8 oz. 411867
Akua Intaglio Ink, Phthalo Green, 8 oz. 411871
Akua Intaglio Ink, Carbon Black, 8 oz. 411875
Akua Intaglio Ink, Titanium White, 8 oz. 411876
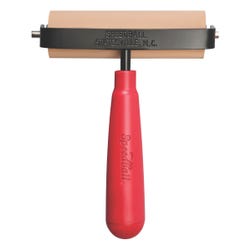
Speedball® Soft Rubber Brayer - 4" wide 216495
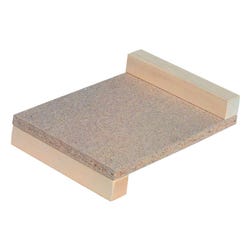
Copper Etching Plate, 6" x 6", 18 Gauge, Sold Individually 469022
More colors, sizes and gauges available on http://www.saxarts.com
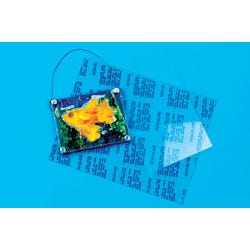
Clear Acrylic Sheets, 12" x 12" x 1/8" thick, Sold Individually 438887
Hand File, 6" length, #2 fine cut, Sold Individually 451742
Double Needle Etching Tool, Sold Individually 456758
Curved Burnisher Etching Tool, Sold Individually 248418
Hollow Scraper Etching Tool, Sold Individually 248419
Rubbermaid® White Polyethylene Tray, 18" x 26" x 3 ½" deep, Sold Individually 458135
Sax Cotton Light-Weight Organdy, 5 yd, White 406376
Linoleum Block Stop, 7 ½" x 11 ¼", Sold Individually 225852
Speedball® Printmaster's Press 380936
Standards
CONTENT Standard #1: Understanding andapplying techniques and processes.
CONTENT Standard #2: Using knowledge ofstructures and functions.
CONTENT Standard #3: Choosing and evaluating a range of subject matter, symbols and ideas.
Instructions
1
Sketching the design: The sketch for the finished print should be done to the actual size of the plate. Try cross-hatching, wavy lines, single lines for gestures, etc. Transferto the plate using carbon paper.
2
Producing the design: Create the authographic image on the plate, using the appropriate tool and block stop/bench hook for safe cutting. Etching leaves an acid bite "sculptural effect" on the plate, while engraving removes metal,creating a line or texture. In dry point the surfaced is scratched and a burr is raised, it's the burr that holds the ink. By using a curved burnisher or hollow scraper over rough "over worked" areas you can re-create a smooth metal surface for contrast.
3
Assessing the design: Print an "Artist Proof" at this stage. This will enable you to determine how the image is developing and make any desired changes.
4
Soaking the paper: The proper paper should be an acid free, cold press paper of 90 to 120 lb., either white or natural color. Soaking the paper is important. This is best done by immersing the papers into a sink or tray for 5 minutes to 30 minutes depending on the weight of the paper. When each sheet hasbeen thoroughly soaked, blot into a dry/damp state (no standing water) between blotters or paper-making couch sheets.
5
Applying the ink: Akua Intaglio Inks have the right consistency for application onto the plate. Using the brayer, apply only the amount of ink to enter the open areas on the plate, (you will hear a slight sticking-tack sound). Overloading the plate with ink will only cause more ink to need to be wiped from the plate.
6
Wiping the plate: Using tarlatan, cheesecloth or light weight muslin, folded into a pad about the size of your hand, wipe in a circular motion to evenly remove the surplus ink that remains on the plate. The second wipe will clear most surface ink and the image will be definite andit's almost ready to print. The final wipe is the lightest and most important, as it will highlight the polished areas and remove any ink halosthat appear around an image.
7
Setting the press: Setting up the press to the correct distance between the rollers is important. This is done best by passing a plate that has NOT been inked and paper through the press. When setting the pressure on the press for the first time, it's best to tighten the screw until it moves no further and then unscrew it just until the press runs freely.
8
Lifting the impression: Draw the plate through the press with a steady even motion. If the paper tears, the pressure is too great; if the ink lines are white, there is not enough pressure or improper inking.
9
Continuing the process: If the impression is a proof or a first state, these may be curated as such. If not, continue with re-inking and impressions until the edition is completed.