Close

I Say, Old Chap
Lesson Plan, Grades 5-12, Art, History, Language Arts, Social Studies, Jack Richeson, Printmaking, Drawing
Description
Lesson Plan and Artwork by Franz Spohn
Ever since the development of Johannes Gutenberg’s printing press, by 1440 the connection between mass produced books and printmaking became inextricable. By the 16th century, chapbooks were being produced on a grand scale. Small books made from a single sheet of paper offered up as almanacs, folklore, ballads, children’s literature, poems, or religious and political tracts were widely disseminated due to the cheap cost of these mass-produced books. Literacy increased as readily available books of all sorts and at affordable prices replaced the single, expensive, hand-copied tomes of past history.
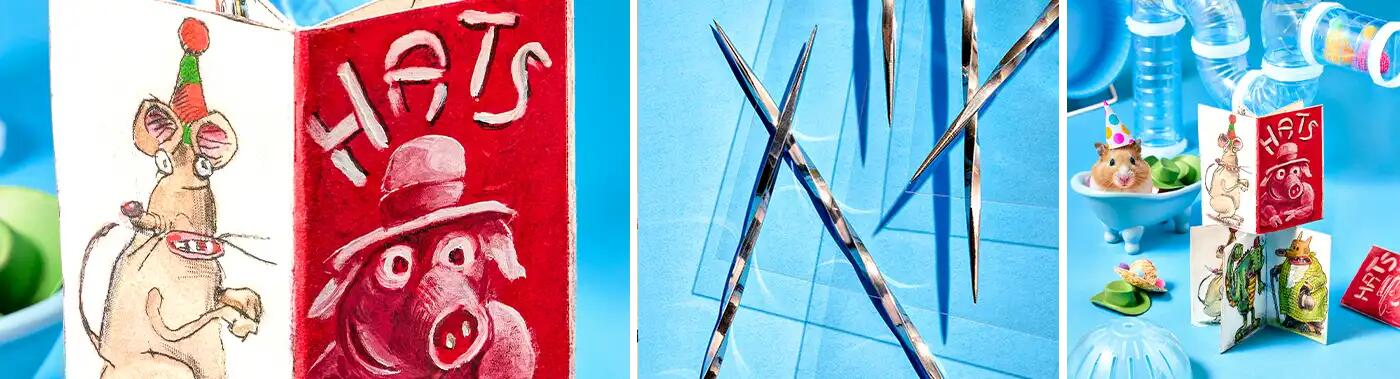
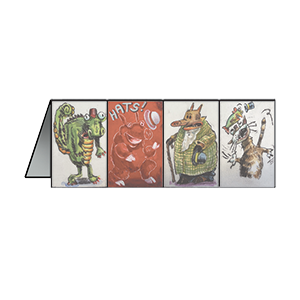
In this project, students will create their own chapbooks on a subject of their own choice illustrated by handcolored intaglio prints. Because chapbooks are simple to construct and have no need for binding techniques, artists can create their own vision in an 8-paneled sequence, offering the opportunity to quickly create a library comprised from the mind’s eye and a single, folded piece of paper.
Objectives
- Develop layout skills in planning images of their books and learn to plan out the sequence and position of a format template.
- Acquire printmaking skills—particularly dry point, crosshatching, and tonal additions.
- Enhance images by experimenting with hand coloring techniques.
- Master the production of chapbooks, and gain a fun and simple method to create personal reflections of an artistic vision.
Supplies Needed
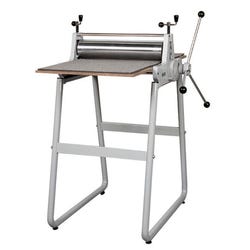
Jack Richeson™ Steel Medium Printing Press With Stand, 19 x 19⅝ x 36”
Jack Richeson™ Blanket Catcher for Medium Press, 18 x 36 x 1/16”, White
Jack Richeson™ Blanket Pusher for Medium Press, 18 x 36 x ⅛”, White
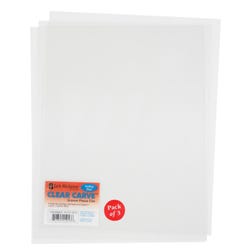
Jack Richeson™ Clear Carve™ Etch Plates, 8 x 10”, Pack of 3
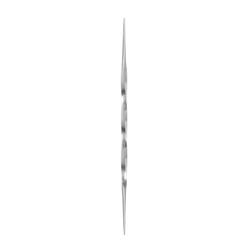
Jack Richeson™ Clear Carve™ Twisted Etching Tool
Akua® Intaglio® Water Based Ink, Carbon Black, 8 Oz
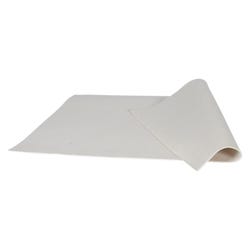
Printmaking Pad, 11 x 14”, 15 Sheets
*Here are the supplies needed for this lesson plan for reference. Find a convenient carousel of shoppable products for this lesson below.
Standards
Standard #2: Organize and develop artistic ideas and work.
Standard #5: Develop and refine artistic work for presentation.
Standard #10: Synthesize and relate knowledge and personal experiences to make art.
Instructions
1
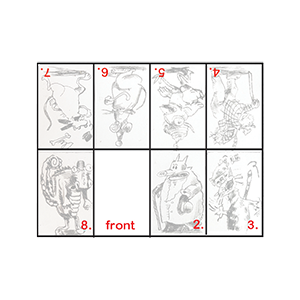
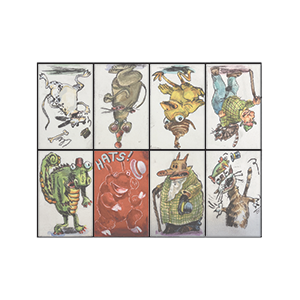
On a sheet of 11” x 12” sheet of paper, draw an 8” x 10” horizontal rectangle. Draw a horizontal line that divides the page in half (4”/4”), and draw 3 vertical lines spaced by 2.5” from the edge of the paper to create 4 sections. This will yield 8 vertical rectangles of 2.5” x 4”. Decide on a theme for the book that reflects your interests, personality, or pure whim. This little book can be a reflection of your artistic vision technically, conceptually, emotionally, or any combo thereof.
Remember: in printmaking the image is reversed on the printed page from its appearance on the plate. This is especially critical if words or numbers are incorporated with the image….they should be inscribed backwards on the plate!
2
Use a pencil or pen with a point to linearly draw your images within the formatted 8 panels. If you orient the template horizontally, the panel in the bottom right corner of the sheet will be the back of the book, the next panel to the right will be the front of the book, followed by pages 1 & 2. Flipping the sheet so the opposite side is on the bottom the panel in the corner bottom right will be page 3, followed in sequence by pages 4, 5, 6, & 7. Place the 8” x 10” plastic Clear Carve plate over your drawing on template and align with drawn borders. Taping the plate to the paper will prevent shifting. Use the Clear Carve twisted etching tool and your drawing as guide, scratch lines into the plate corresponding to those of your drawing underneath the plate; the deeper and wider the gouged lines, the darker and thicker the resulting printed line will be.
3
Once the major lines are complete, create additional tonal areas by crosshatching lines that are more delicate and more lightly inscribed, or experiment using sandpaper to roughen areas to produce tones. For a more painterly or abstract approach, rely on mono-printing techniques. Or, use all of the above in combination. This is a wide open format for personal expression and there isn’t any one way that is exclusively correct, so follow your instincts and experiment. Push limits, experiment, enjoy the journey.
4
Scratching lines into a plate is known as dry point. Once completed the plate is printed on a Jack Richeson Printing Press. The burr of plastic that is thrown to the side of the incised line will print as a soft shadow of the intended line, but after a number of impressions this burr will break off to create a crisper line. Ink is spread over the plate, forced down into the cracks, and the surface of the plate is wiped clean with tarlatans (starched cheesecloths). A printing press is necessary in order to force the paper, which has been soaking in water and then blotted to remove excess moisture, down into the cracks and crevices to pull the ink out of the incised lines. The plate can then be immediately inked for additional copies.
NOTE: When you are done printing, make sure to thoroughly clean the plate of all ink.
5
After the plate has been prepared, inked, wiped, and printed, place the printed sheet between blotters and weight it (a heavy coffee table art book is excellent for this). Allow plenty of time to facilitate the printed sheet drying flat. Trim the excess paper to yield the 8” X 10” piece of paper that is destined to be your book.
6
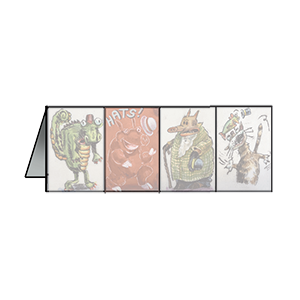
Once the printed page is dry and trimmed, enhance your image with watercolor, color pencil, markers, or a combination of media according to your purpose. Or, simply leave it as a printed image.
7
After all alterations are complete (though once the book is assembled, additional processing can still happen), follow the instructional guide for folding and cutting the single sheet to produce the chapbook. There are a variety of excellent instructional videos on YouTube for additional visual aid. A bone folder or smooth cylindrical object like a color pencil shaft can help in pressing the folds and making them crisp.
8
Once the book is created through the folding process, staple through the outside of the book and through the spine to stabilize the structure if desired. Additionally, a cover made from a piece of paper 4.5” X 5.5” and folded in half can be positioned over the book and stapled along with the book. Take advantage of the editioning aspects inherent in printmaking and make several copies of the book, so more people can enjoy your vision!
1. Layout page to yield 8 equal vertical panels; on an 8” x 10” sheet each section will be 2.5” x 4”. Use this as a guide to lay out your images.
2. After printing and hand-coloring, fold in half length-wise.
3. Unfold
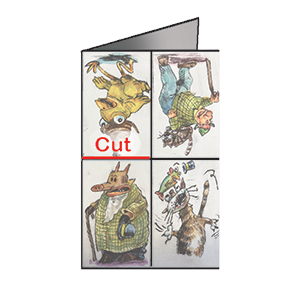
4a. Fold in half width-wise
4b. Cut from folded edge to midpoint of page.

5. Fold again from outside edges to middle.
6. Unfold then refold in half length-wise.
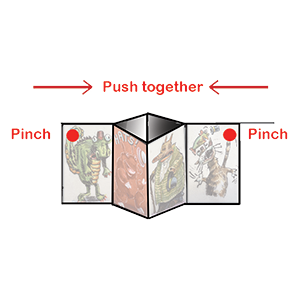
7. Pinch top of outside corners and push to center; this opens a diamond void shape in the center.
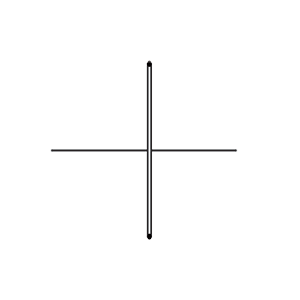
8. When completely "pushed" together structure will look like a cross with the center, vertical portion "doubled" from a top view.
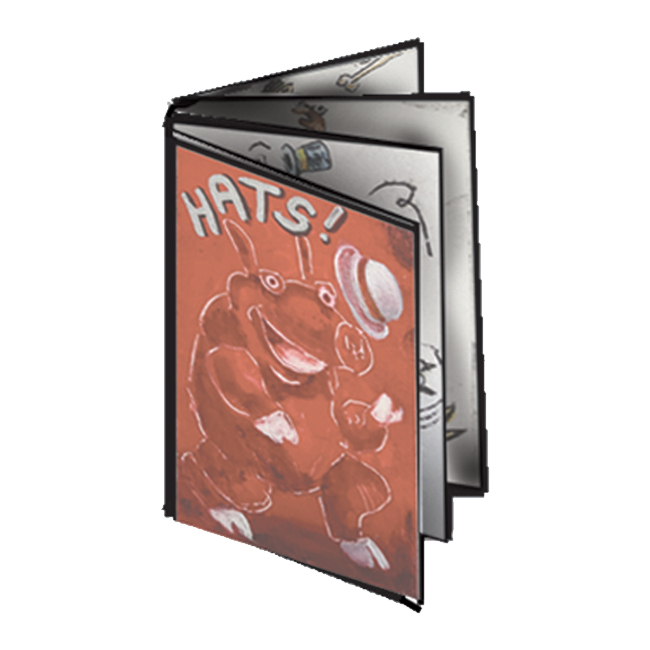
9. Squeeze the pages together with the front page being first and firmly press to compact the pages. A bone folder can to help flatten and compress all edges.