Close

Handmade Paper Collage
Lesson Plan, Grades 6-12, Art, History, Science, Language Arts, Sax, Collage
.jpg)
Description
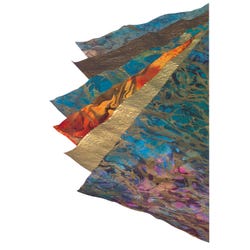
Lesson Plan and Artwork by Phyllis M. Annett
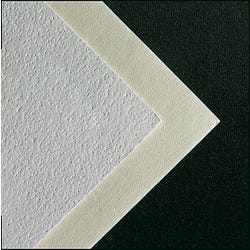
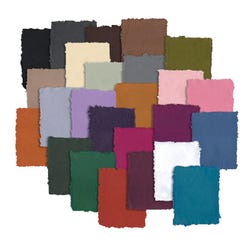
Using only various textured Handmade Papers, students will create a simple collage landscape or seascape, thus experiencing the art of collage and the power of the elements and principals of design. Students will create their work directly on Crescent mounting board. The finished artwork can be matted for display.
Objectives
- Students will experience and appreciate the differences and qualities of handmade paper.
- Students will understand the art of collage and its place in art history.
- Students will recognize and utilize the elements and principals of art and design in their work.
Supplies Needed
Crescent® Create and Show Kit, Smooth White, 22" x 28", Pack of 15
Aileen's® Acid Free Tacky Spray Glue, Crystal Clear, 10 oz.
Thai Marbled and Metallic Paper, Assorted Colors and Sizes, Pack of 6
Colored Unyru Paper, Assorted Colors, 25" x 37", Pack of 12
Shizen Design Handmade Pastel Paper, Assorted Colors, 8 1/2" x 11", Pack of 25
Yes! Paste® Non-Toxic Glue, 19 oz.
Sax® Watercolor Paper Packs, 18" x 24", 140 lb., Pack of 50
Sax® Filbert Golden Taklon Artists Brush Set, Set of 4: 2, 4, 6 and 10 sizes
Liquitex® Professional Acrylic Ink Essentials Set, Assorted Colors, 1 oz. each, Set of 6
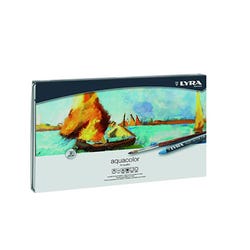
Lyra® Aqua Color Crayons, Assorted Colors, Pack of 48
*Here are the supplies needed for this lesson plan for reference. Find a convenient carousel of shoppable products for this lesson below.
Standards
Standard #1: Generated and conceptualize artistic ideas and work.
Standard #2:Organize and develop artistic ideas and work.
Standard #3: Refine and compete artistic work.
Standard #5: Develop and refine artistic work for presentation.
Standard #7: Perceive and analyze artistic work.
Standard #9: Apply criteria to evaluate artistic work.
Standard #10: Synthesize and relate knowledge and personal experiences to make art.
Standard #11: Relate artistic ideas and works with societal, cultural and historical context to deepen understanding.
Instructions
1
Inform students they will be creating a very simplistic collage from handmade paper using either a landscape or seascape as the subject. Show students various handmade paper and discuss the history of paper making and where and how they are made. Then, as now, paper was made from hemp, mulberry, fishnets, cotton, wood and cellulose among other natural fibers. Point out how the papers have different textures and thicknesses and color values. Inform students that Collage comes from French word 'coller' meaning ' to glue'. Show art work of famous collage artists such as Matisse and Picasso who introduced collage to the art world in Paris during the beginning of the 20th century. Stress the fact that a collage is the sum of individual elements glued to a background to create a whole.
2
Discuss the elements and principals of design to help students achieve the best result for their collage. Inform students they will choose between a landscape or seascape for this project. Discuss how color and size of shapes will translate as perspective in their work. Explain how varying paper of different textures and weights will make the landscape or seascape more interesting and will add depth and dimension to the art work.
3
Demonstrate how to start a collage: Lay out papers to choose color schemes and textures of the handmade papers. Demonstrate how to use both paste and spray adhesive to neatly glue parts of the landscape or seascape. Students should select the size of the Crescent mounting board for their artwork which will become the base.
4
Next, students will sketch a very simple composition for their landscape or seascape to have a general idea of their work's composition. Remind students of the elements of design (line, shape, value, color, movement, size and pattern) and principals of design (harmony, rhythm, repetition, gradation, balance and dominance). Students may choose from these elements, but do not have to include all.
5
Using their general sketches for composition as a guide, students will cut shapes from manila paper for the parts of the composition. These will be the templates for the components of their landscapes or seascapes. After they have laid out these templates, the next step is to cut the shapes from the actual handmade papers of their choice. Tell students to move pieces, try them in different positions, but don't glue anything down until they have decided on placement of pieces in relation to one another. Use intense colors of paper to represent foreground detail and subtler colors for middle and background items. Thinner, transparent papers are good for overlaying, to give the illusion of detail and distance. This will create visual depth and perspective. Tell students to work on the assemblage of pieces in this order: sky, background, then foreground. They will realize you cannot glue something in the foreground first, then be able to get behind those pieces to add the middle, background and sky areas in place.
6
Allow work to dry for a day or two. Lastly, coat the collage with a thin layer of matte varnish. This will give a protective coating and nice finish to the work.
7
Have students critique their work and that of others, and display the art with pride.